Once you have setup or in some cases signed up for the free trial.
Step 1.
Click the settings icon next to the company in the upper right hand side of the screen. In the below example; click "Keva Juice".
Click "Import Desktop Data".

Step 2.
You will need to determine which version of Quickbooks you are using. This can be quite confusing, hence most people will not know there version number. Intuit makes the process simple and will guide you through this.

Step 3.
Once you select your version; quickbooks will guide you through either navigation to the Quickbooks navigation portal, have you download the update utility, or have you export and update the files directly. You will need to login to to your quickbooks account to continue.
Once you select your version; quickbooks will guide you through either navigation to the Quickbooks navigation portal, have you download the update utility, or have you export and update the files directly. You will need to login to to your quickbooks account to continue.

Step 4.
You can start from scratch or choose to upload your current company to Quickbooks online.

Step 5.
Quickbooks will warn that any data that has already been setup will be erased from you online setup.

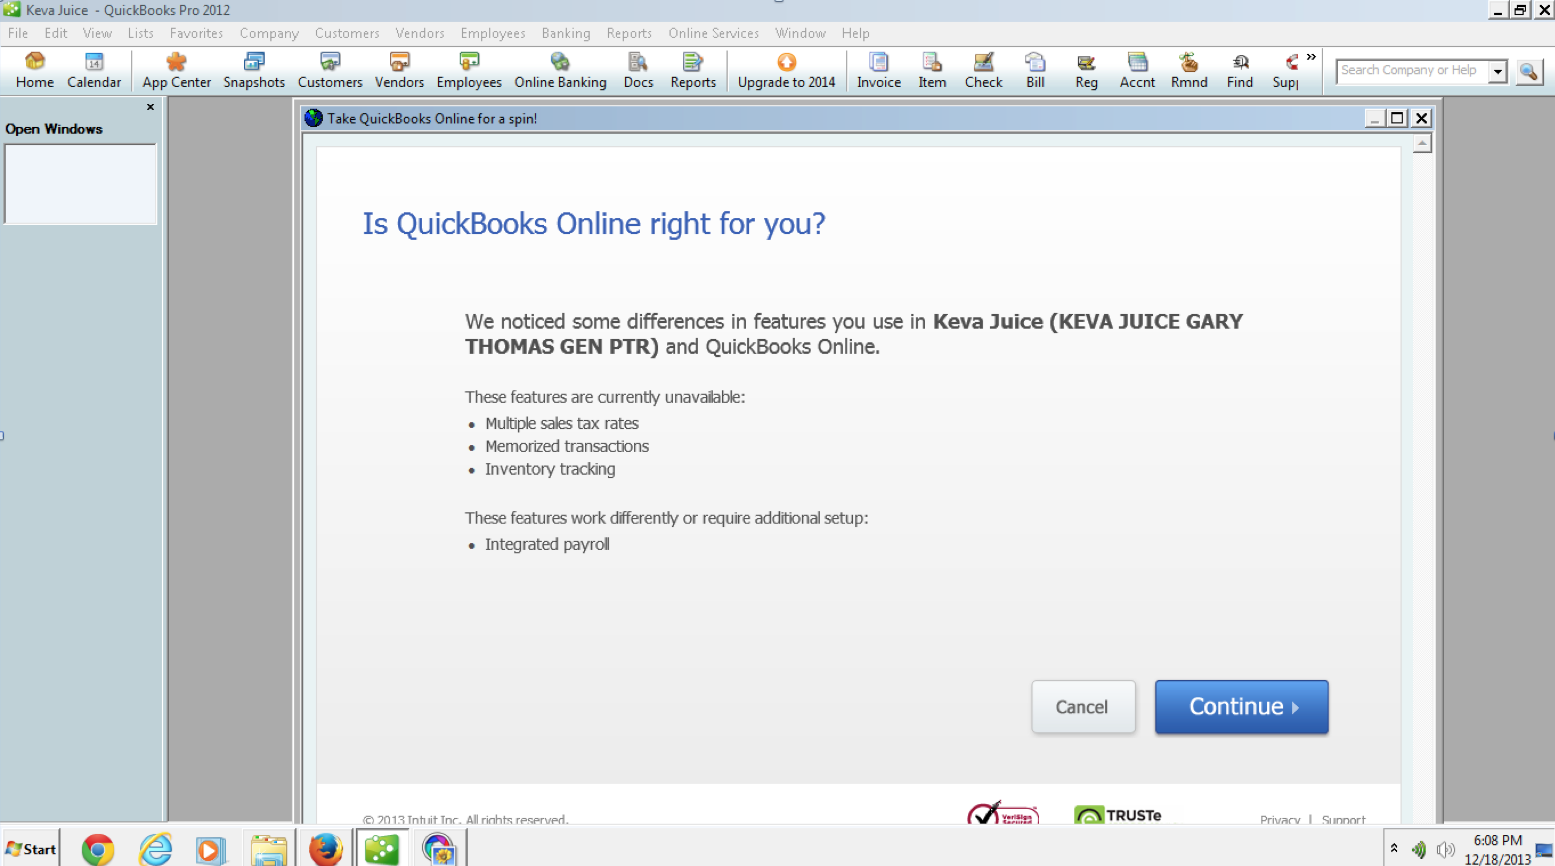
Step 6.
Is Quickbooks Online right for you? Quickbooks will analyze your current setup and data to determine differences in features you use. This includes items such as: multiple sales tax rates, memorized transaction, and inventory tracking.
Step 7.
Once complete. Quickbooks will take several minutes to update you data file. In rare cases it will take at least 24hours. Keep in mind that Quickbooks online has a limit of 250mb per file. If this is the case, you will need to contact support.
Potential Errors:

Once complete. Quickbooks will take several minutes to update you data file. In rare cases it will take at least 24hours. Keep in mind that Quickbooks online has a limit of 250mb per file. If this is the case, you will need to contact support.
Potential Errors:
- Java Upload Error: https://prod-qbo.intuitcdn.net/c1/v68.147/scripts/desktopImportUpload.js
- If you encounter this error, you will need to have your information uploaded manually. Please see the troubleshooting page for more details.

No comments:
Post a Comment